Put the machine between the noise source and the sleeper, not right next to their head: about 3 to 6 feet from an adult’s pillow, and at least 7 feet from a baby’s crib. Never set it inside the crib or bassinet. Keep the volume at a conversational level, per AAP and NIOSH guidance, and use the quick checklist below to confirm your setup actually works.
TL;DR:
- Placing a white noise machine 3 to 6 feet from an adult’s head or at least 7 feet from a baby’s crib ensures safe and effective masking of external noise.
- Position the device on a hard, flat surface facing the noise source, never behind curtains or inside a crib, to prevent volume elevation and achieve optimal sound dispersion.
- Use a sound-level app to verify the volume stays around 50 decibels at the sleeper’s head, and avoid exceeding this level regardless of volume dial settings.
- Regularly recheck the placement and decibel level after adjusting nursery furniture or room layout, as small changes can significantly affect safety margins.
- Features such as volume caps and timers help maintain safe volume levels and support gradual weaning from continuous white noise use.
Table of Contents
- White Noise Machine Placement Guidelines for Every Room
- How Loud Should a White Noise Machine Be for Baby Safety?
- Setup Checklist: Confirm Your Placement Actually Works
- Placement Fixes for Shared Rooms, Travel, and Noisy Neighbors
- Why Evergreen Bliss Builds Placement Safety Into the Product
- A Parent’s Honest Take on the Distance Rules
- Sleep Tools Built Around Safe Placement
- Sources
White Noise Machine Placement Guidelines for Every Room
Masking works by sitting between the problem and the person, not next to either one. If a hallway or a barking dog is the issue, the machine belongs closer to that noise, angled toward it, so the sound has to pass through the white noise before it reaches the sleeper. Push it right up against the bed instead, and you’re just adding a second loud thing next to someone’s ear instead of covering up the first one.
For adults, the sweet spot is roughly 3 to 6 feet from the head of the bed, on a nightstand or dresser at or slightly above ear height. That height matters more than people realize: sound disperses more evenly from a raised surface, so you get a smoother wash of noise instead of one side of the pillow catching more of it than the other.
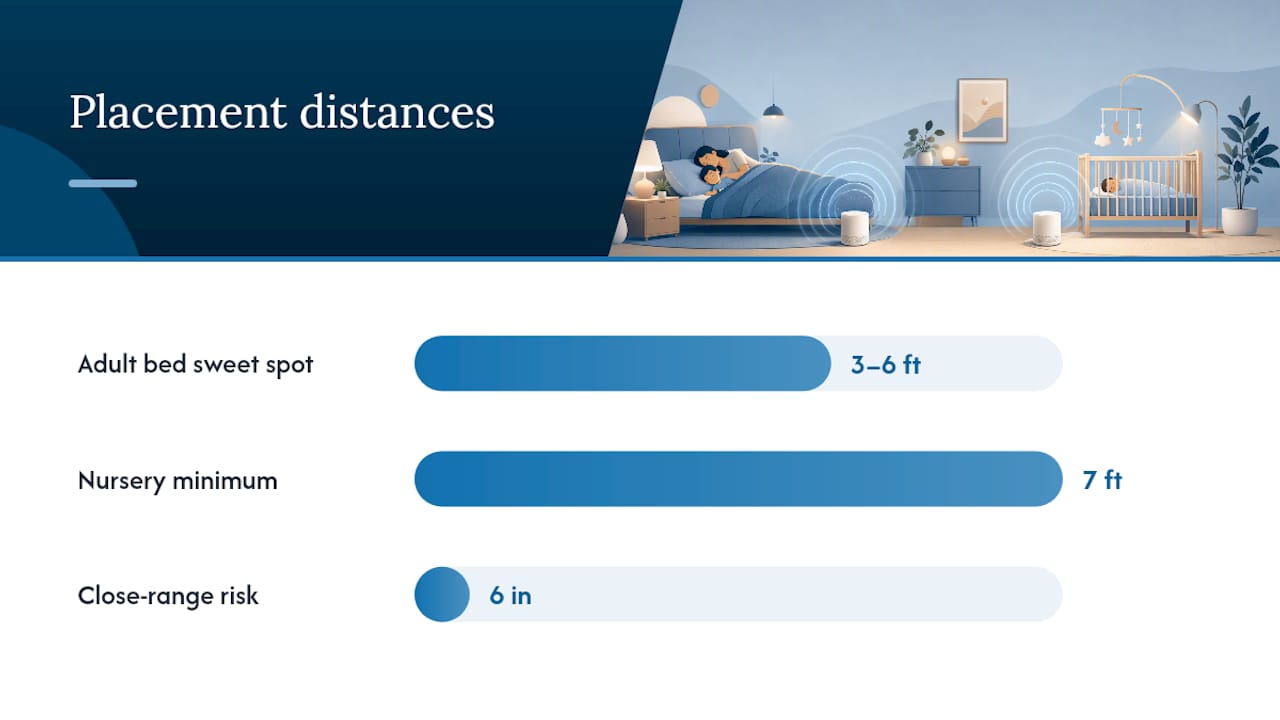
For a nursery, the math changes because the stakes are different. Henry Ford Health recommends keeping the device at least 7 feet from the crib, on a shelf, dresser, or the far wall, never clipped to the crib rail or tucked inside it. That distance isn’t arbitrary caution. At close range, even a “gentle” white noise setting can hit ear-damaging decibel levels, because the volume you hear from across the room is much louder six inches from the source.
A few placement habits make the difference between effective masking and wasted volume:
- Put the unit on a hard, flat surface, not on carpet or bedding, which absorbs sound and tempts you to crank the volume higher to compensate.
- Skip the floor for general masking. Floor placement is useful when you specifically want to dampen low-frequency rumble, like a furnace or traffic noise, but it dulls higher-pitched dispersion.
- Never hide the machine behind a curtain, inside a closet, or under a stack of blankets. Blocking the speaker grille forces you to raise the volume to compensate, which defeats the point of placing it thoughtfully in the first place.
- In a larger bedroom or an open nursery layout, one machine may not reach every corner evenly. A second, lower-volume unit placed near the door or window often beats turning one machine up to fill the whole room.
- Orient the speaker toward the noise source, whether that’s a window facing the street or a shared wall, rather than aiming it straight at the sleeper.
Room shape throws people off more than room size does. A long, narrow nursery with the crib at one end and the door at the other needs the machine roughly in the middle, angled toward the door, so it intercepts hallway noise before it ever reaches the crib. A square room with the crib near a window has a simpler fix: place the machine on the side of the room between the window and the crib, not tucked into whatever corner has an open outlet.
How Loud Should a White Noise Machine Be for Baby Safety?
Aim for the volume of normal conversation, measured from where the baby or sleeper actually rests their head. That’s the practical target Babylist’s safety guidance points to, and it lines up with how Henry Ford Health frames safe use: keep the machine at distance, and skip the highest volume settings entirely.
Here’s the part parents miss: volume and distance are the same variable wearing two different hats. A machine that’s “quiet enough” at 7 feet can be uncomfortably loud at 12 inches. If you find yourself pushing the dial up because the room feels too noisy without it, that’s usually a sign the machine needs to move closer to the noise source, not louder overall.
By the numbers: The American Academy of Pediatrics recommends a conservative approach to infant noise exposure, and Henry Ford Health’s specific guidance is to keep white noise machines at least 7 feet from a crib while avoiding top volume settings, since proximity and loudness compound each other’s effect on developing ears.
Measuring this yourself takes two minutes and doesn’t require special equipment:
- Open a sound-level app on your phone (NIOSH lists several free options built for this).
- Set the phone at the exact spot where the baby’s or sleeper’s head rests.
- Turn the machine on at its lowest useful setting and read the level.
- Increase gradually until it masks the target noise, checking the reading each time.
- Note the volume setting once you hit roughly 50 dB, and don’t go past it out of habit.
On duration, the debate over running white noise all night versus using a timer doesn’t have one right answer, but it does have a sensible default. Continuous low-level use overnight is common practice and generally fine at safe distance and volume. Where a timer helps is in weaning a child off dependence on the sound as they get older, or in flagging you if a machine somehow got bumped closer to the crib during a diaper change at 2 a.m. Reassess the setup every few months since a baby who’s rolling and scooting interacts with their sleep space very differently than a newborn who can’t move at all.
One more thing worth saying plainly: white noise masks sound. It does not check on a hungry, sick, or unsafely positioned baby. Research on infant noise exposure supports using it as a sleep aid, not a substitute for the basic checks every caregiver still needs to do.
Setup Checklist: Confirm Your Placement Actually Works
Placement guidance means nothing until you test it in the actual room, with the actual furniture, at the actual time of day the machine will run. This takes about ten minutes.
- Choose a hard, flat surface 3 to 6 feet from an adult’s head, or at least 7 feet from a crib.
- Set the machine at that spot, speaker facing the noise source (door, window, shared wall).
- Route the power cord along the wall or behind furniture, never across a walkway or within reach of a crib rail.
- Run the phone-in-crib test: put your phone where the baby’s head will rest, play the machine, and check the decibel reading against the roughly 50 dB target.
- Stand at the doorway and confirm you can still hold a normal conversation over the sound. If you’re raising your voice, it’s too loud.
- Set a volume cap or timer if the machine offers one, and note the setting somewhere you won’t forget it.
Cord and fall safety deserves its own pass, separate from sound testing. Secure any loose cord with a clip or tape well out of a crawling baby’s reach, and never run one across a path someone walks at night. A machine on a dresser edge that a toddler could pull down is a placement failure regardless of how good the decibel reading is.
On features: a volume cap prevents a caregiver, or a curious sibling, from accidentally cranking the machine to an unsafe level. A timer supports the weaning process as your child grows. And a choice of white, pink, or brown noise matters more than marketing suggests, since different noise profiles handle low-frequency rumble differently, which is useful if your noise problem is traffic or a furnace rather than a chatty hallway.
Pro Tip: Re-run the phone-in-crib test every time you rearrange the nursery, not just when you first set up the machine. A crib moved two feet closer to the dresser can quietly erase your safety margin.
Placement Fixes for Shared Rooms, Travel, and Noisy Neighbors
Siblings sharing a room rarely have identical noise needs, and a single machine blasting from one corner tends to create hot and cold spots rather than even coverage. Central placement between both beds, angled toward whichever wall faces the household’s noisiest activity, usually beats parking it next to either child individually.
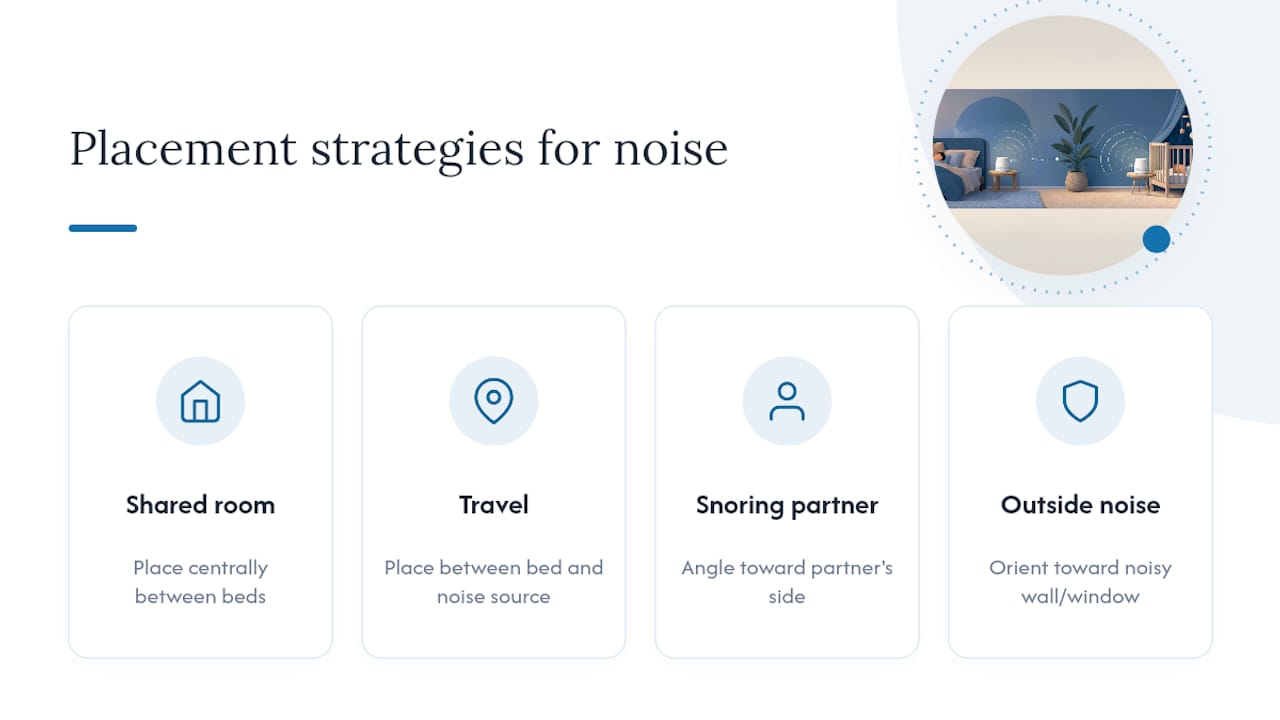
Hotel rooms and travel setups call for lower volume than you’d use at home, since the room is smaller and hard surfaces bounce sound around more. Place the machine between the bed and whatever’s letting noise in, the window, the door, or the connecting wall, rather than defaulting to the nightstand out of habit.
A snoring partner is a masking problem, not a volume problem. Instead of turning the machine up near your own ear, angle it toward your partner’s side of the bed so it intercepts the snore at the source. It takes less volume overall and spares your own hearing the brunt of it.
For a noisy street or thin apartment walls, orient the machine toward that wall or window before you touch the volume dial. If you’re regularly cranking it past a comfortable level just to cover outside noise, that’s usually a sign to address the gap in the room itself, weatherstripping, a heavier curtain, a door sweep, rather than asking one small speaker to fight a losing battle against a truck route.
Why Evergreen Bliss Builds Placement Safety Into the Product
Evergreen Bliss designs sleep tools around the same rules laid out here, because a good machine should make safe placement the easy default, not something you have to fight the device to achieve.
- Volume caps stop the dial from sliding past a safe conversational level, even during a groggy 3 a.m. adjustment.
- Built-in timers support the weaning process as your child grows and cut down on all-night full-volume habits.
- Compact, stable footprints sit securely on a dresser or shelf at the 7-foot infant distance without tipping or needing to be propped against something that blocks the speaker.
Clear setup instructions ship with every unit, which matters more than it sounds. It’s easier to follow the crib-distance rule when the product itself reminds you of it, instead of leaving you to guess. Evergreen Bliss also publishes ongoing guidance on using white noise safely for exactly this reason.
A Parent’s Honest Take on the Distance Rules
The 7 foot rule reads cleanly on a page and far less cleanly in a real nursery with a shared wall and a dresser that’s already full. Perfect compliance matters less than the direction you default to: when in doubt, move the machine farther away and let it mask gently rather than loudly. Sealing an actual noise gap, a hollow-core door, a drafty window, does more long-term good than pushing the volume higher ever will. Recheck the setup every few months. A crawling baby and a newborn need two different rooms, even if it’s the same four walls.
— Cadence
Sleep Tools Built Around Safe Placement
Evergreen Bliss is the practical alternative to guessing your way through crib distance and volume settings: our machines are built with the caps, timers, and compact sizing this guide recommends, so the safety math is already handled before you plug it in.

That matters most in the exact moment placement rules feel hardest to follow, a small nursery, a shared wall, a partner who runs hot on volume. A unit with a hard volume ceiling and a built-in timer removes the guesswork that leads to a machine creeping too close or too loud over time. Browse the personal care and sleep aid collection to find a model sized for your nursery or bedroom, check the white noise machine product page for the specific volume and timer specs, and set it up tonight using the checklist above.
Sources
For deeper reading beyond this guide: the AAP’s policy on infant noise exposure covers the safety rationale, Henry Ford Health explains the 7 foot crib distance, NIOSH lists free decibel-measuring apps, and this PubMed review covers infant sound exposure research.
- Are White Noise Machines Safe for Your Baby? | Henry Ford Health
- Preventing excessive noise exposure in infants (AAP policy)
- NIOSH — Noise and hearing loss prevention (app guidance)
- How to Use a Sound Machine: The Safety Basics