The most useful types of at-home spa treatments to start today are facials (steam, mask, massage), body scrubs, bath soaks, hand and foot rituals, self-massage, scalp and hair masks, and paired relaxation practices like breathwork or a body scan. You can run any of these in 10 minutes or stretch a combination into a full 60-minute ritual with nothing more than pantry staples and a few basic tools.
Quick treatment benefits at a glance:
- Facial steaming opens pores and softens skin for better mask absorption
- Exfoliating scrubs remove dead skin cells and leave skin noticeably smoother
- Epsom salt baths ease muscle tension and support a calmer mood
- Hand and foot soaks soften calluses and relieve tired, achy feet
- Self-massage reduces neck and shoulder tightness in under 15 minutes
- Scalp oil treatments nourish hair and double as a stress-relief ritual
- Breathwork paired with any treatment deepens relaxation and lowers perceived tension
Minimal supplies to have on hand:
- Two clean towels (one for face, one for body)
- A carrier oil (coconut, jojoba, or olive oil)
- Coarse sugar or fine sea salt for scrubs
- A clay or sheet face mask
- A foot basin or large bowl
- Epsom salts
- A few drops of essential oil (lavender, eucalyptus, or peppermint)
| Treatment | Primary purpose | Typical time |
|---|---|---|
| Facial steam + mask | Cleanse, hydrate, brighten | a typical short duration |
| Body scrub | Exfoliate, smooth skin | a brief treatment session |
| Bath soak | Muscle relief, mood reset | a moderate soak time |
| Hand/foot ritual | Soften, soothe, tidy nails | a short self-care session |
| Self-massage | Tension relief, circulation | a quick massage period |
| Scalp/hair mask | Hydrate, strengthen hair | a typical hair treatment duration |
| Breathwork/body scan | Stress reduction, calm | 5–20 min |
Key Takeaways
A consistent, sequenced home spa ritual using the warm-treat-settle structure delivers measurable stress relief and skin benefits that a single session cannot.
| Point | Details |
|---|---|
| Start with one 10-minute ritual | A single soak or breath-focus session builds the habit better than waiting for a free hour. |
| Sequence treatments correctly | Scrub before soaking, soak before masking; this prevents washing off products and avoids over-exfoliation. |
| Patch test every new ingredient | Apply to the inner wrist 24–48 hours before full use to catch reactions early. |
| Pair breathwork with any treatment | Even 5 minutes of breath focus before a mask or soak deepens relaxation and reduces perceived tension. |
| Evergreenbliss tools extend the benefits | Devices like acupressure mats and percussion massagers reach muscle and sleep recovery that DIY recipes alone cannot. |
Table of Contents
- What types of at-home spa treatments are available?
- 1. Facial treatments: steam, exfoliation, masks, and massage
- 2. Body scrubs and polishes: safe recipes and how to apply them
- 3. Baths and hydrotherapy: soaks, salts, and aromatherapy
- 4. Hand, foot, and nail treatments: soaks, scrubs, and simple pedicures
- 5. Self-massage: manual techniques and at-home devices
- 6. Scalp and hair treatments: masks, oils, and thermal wraps
- 7. Relaxation practices to pair with any treatment
- 8. How to set up your at-home spa space
- 9. Safety, skin types, allergies, and when to skip a treatment
- 10. Why regular at-home rituals actually work
- What the Evergreenbliss approach to home wellness looks like
- Evergreenbliss tools that complement your home spa rituals
- Sources
What types of at-home spa treatments are available?
Think of this as your menu. Each treatment below fits a different time window and need, so you can pick one on a rushed Tuesday or stack several for a Saturday ritual.
- Facial treatments (steam, exfoliation, mask, massage): 20–30 minutes. Best for skin clarity and tension in the face and jaw.
- Body scrubs and polishes: 15–20 minutes. Best for rough elbows, knees, and dull skin anywhere.
- Bath soaks and hydrotherapy: 20–45 minutes. Best for full-body muscle relief and mood reset.
- Hand and foot treatments: 15–30 minutes. Best for calluses, dry cuticles, and tired feet.
- Self-massage: 10–20 minutes. Best for neck, shoulder, and calf tension.
- Scalp and hair masks: 20–45 minutes (including leave-in time). Best for dry, brittle, or stressed hair.
- Relaxation practices (breathwork, body scan, guided imagery): 5–20 minutes. Best paired with any treatment above to amplify stress relief.
Each section below walks through the steps, materials, and timing for every one of these. Therapist-backed sequencing consistently follows the same logic: warm the body first, apply the treatment, then settle into rest.
1. Facial treatments: steam, exfoliation, masks, and massage
The easiest facial treatment to start with is a 20-minute steam-and-mask routine. It requires no special equipment and delivers a visible glow that most people notice immediately.
What you need: gentle cleanser, a bowl of hot water or a face steamer, a towel, a clay or honey mask, a light exfoliant (1 tsp sugar mixed with a few drops of oil), and a moisturizer. A gua sha stone or facial roller is optional but useful for the massage step.
Step-by-step basic facial:
- Cleanse with a gentle, fragrance-free cleanser. Pat dry.
- Steam for 5–8 minutes. Drape a towel over your head above a bowl of hot (not boiling) water, or hold your face 10–12 inches from a face steamer. Keep eyes closed.
- Exfoliate with the sugar-oil mix, using light circular motions for 60 seconds. Rinse thoroughly.
- Apply mask (clay for oily skin, honey or yogurt for dry skin). Leave on for 10–15 minutes.
- Massage with clean fingertips or a gua sha tool. Use upward strokes from the jaw to the temples, and gentle circles around the eye area.
- Moisturize immediately after patting the face dry.
Safety notes:
- Patch test any new mask ingredient on your inner wrist 24 hours before applying to your face
- Limit exfoliation to once or twice a week; more frequent use irritates the skin barrier
- Keep steam water below 110°F to avoid burns; people with rosacea or broken capillaries should skip steam entirely
- Anyone with active eczema, psoriasis, or open breakouts should avoid physical exfoliants on affected areas
A quick version (cleanse, steam, moisturize) takes about 10 minutes. The full routine above runs 25–30 minutes. For a deeper treatment, add a second mask layer and extend the massage to 10 minutes.
2. Body scrubs and polishes: safe recipes and how to apply them
A safe at-home body scrub routine takes 15–20 minutes and leaves skin noticeably smoother. People with sensitive skin, active sunburn, eczema flares, or open wounds should skip scrubbing those areas entirely and use a gentler washcloth instead.
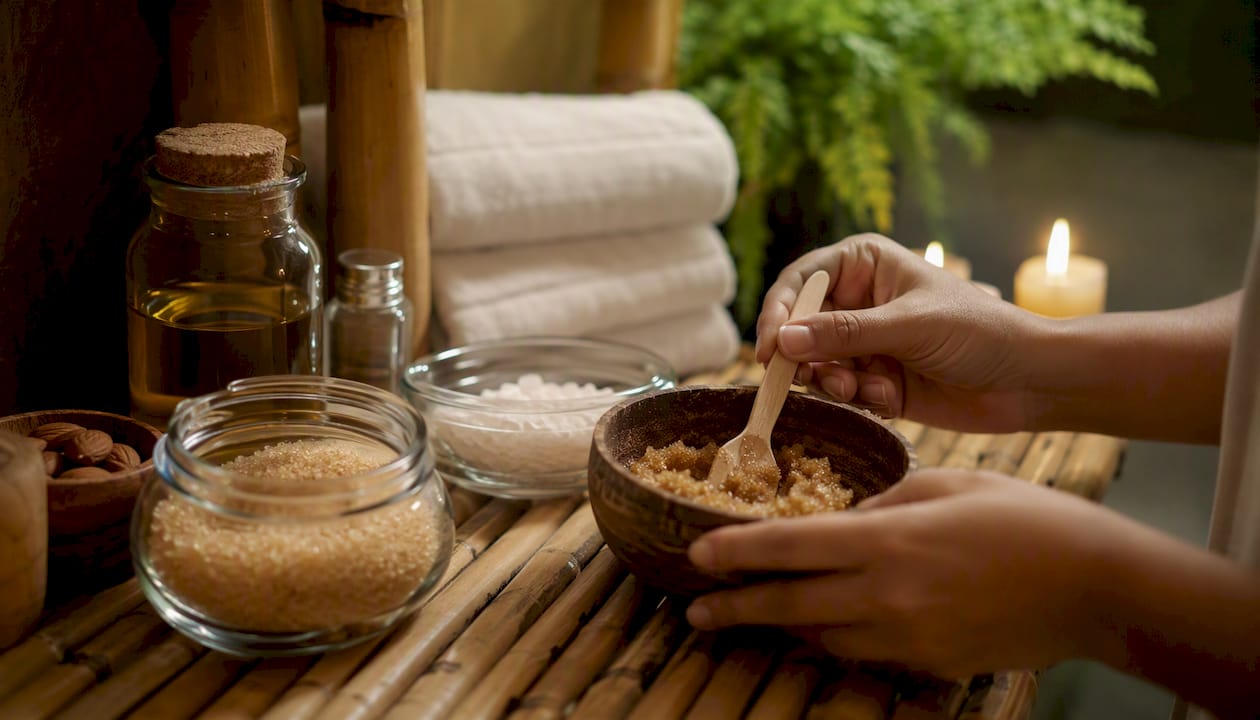
Two simple DIY scrub recipes:
Sugar and oil scrub (all skin types):
- 1/2 cup coarse white or brown sugar
- 3 tablespoons coconut oil or olive oil
- Optional: 5 drops of lavender essential oil
- Mix until combined. Use within one week; store in a sealed jar away from water.
Coffee scrub (best for legs and arms):
- 1/2 cup used coffee grounds (cooled)
- 2 tablespoons coconut oil
- 1 tablespoon brown sugar
- Mix and use immediately; coffee grounds spoil quickly once wet.
How to apply:
- Wet skin thoroughly in the shower or bath.
- Take a small handful of scrub and apply in circular motions, working upward from the feet toward the heart.
- Use light-to-medium pressure. The scrub does the work; pressing hard causes micro-tears.
- Avoid the face, neck, chest, and any irritated or broken skin.
- Rinse completely with warm water.
- Pat dry and apply a rich moisturizer or body oil within two minutes while skin is still slightly damp.
Exfoliate the body once a week for most skin types, or every 10–14 days for sensitive skin. Budget-friendly DIY scrub recipes like these are inexpensive enough to repeat regularly without any special shopping trip.
3. Baths and hydrotherapy: soaks, salts, and aromatherapy
The simplest restorative soak is an Epsom salt bath. Warm water alone relaxes muscles; the magnesium sulfate in Epsom salts may support further muscle relaxation and mood, making it a reliable go-to after a long day or a hard workout.
What you need:
- 2 cups Epsom salts
- Optional: 1/2 cup baking soda (softens water and soothes skin)
- 5–10 drops of essential oil diluted in 1 tablespoon of carrier oil before adding to the tub
- Candles or dim lighting
- A playlist or white noise
- A glass of water to sip during the soak
Essential oil dilution and safety:
Never add undiluted essential oil directly to bathwater. Oil and water do not mix, so undiluted drops sit on the surface and contact skin at full concentration, which can cause irritation or burns. Always pre-mix essential oils into a carrier oil (coconut, jojoba, or almond) at a ratio of roughly 5–10 drops per tablespoon of carrier oil before stirring into the bath.
Safe bath temperature: Keep water between 98°F and 104°F. Hotter water raises heart rate and can cause dizziness, especially if you soak for more than 20 minutes.
Contraindications: Avoid hot baths during pregnancy (consult your OB-GYN), if you have cardiovascular disease or low blood pressure, or if you have open wounds or active skin infections. Young children should never bathe in water above 100°F.
A standard soak runs 20–30 minutes. For a deeper muscle-relief session, extend to 40–45 minutes and add a cool rinse at the end to close pores and refresh circulation. Low-cost bath retreat ideas like eucalyptus hung in the shower stream or warmed towels waiting on the rack add a hotel-spa feel for almost nothing.
4. Hand, foot, and nail treatments: soaks, scrubs, and simple pedicures
A 15–30 minute hand and foot ritual delivers visible softness and comfort you can feel immediately. It is also one of the most underrated self-care spa treatments because the results are instant and the cost is minimal.
Step-by-step routine:
- Soak feet in a warm basin with 1/2 cup Epsom salts and a few drops of peppermint oil for 10 minutes. Soak hands in a small bowl of warm water with a squeeze of honey for 5 minutes.
- Exfoliate with a sugar scrub or a pumice stone on heels and rough patches. Use gentle circular motions on hands.
- Cuticle care: push back softened cuticles gently with a wooden cuticle stick. Never cut cuticles; they protect against infection.
- Mask: apply a thick layer of mashed avocado mixed with a teaspoon of olive oil to feet, then wrap in plastic wrap or warm damp towels for 10 minutes. For hands, apply the same mixture or a thick layer of plain shea butter under cotton gloves.
- Rinse and dry thoroughly, especially between toes.
- Moisturize with a rich foot cream or body butter. For an overnight treatment, apply generously and sleep in cotton socks.
Safety note for people with diabetes or circulation issues: Avoid hot soaks (keep water at body temperature, around 98°F), skip pumice stones on numb or fragile skin, and inspect feet carefully after any treatment. Consult your doctor before trying new foot treatments if you have peripheral neuropathy.
A quick version (soak and moisturize only) takes 15 minutes. The full routine above runs 25–30 minutes.
5. Self-massage: manual techniques and at-home devices
For quick tension relief, start with the neck and shoulders. That is where most people carry stress, and five minutes of focused work there produces a noticeable shift in how the rest of the body feels.
Step-by-step manual sequence:
- Neck and shoulders: sit upright. Use your fingertips to apply slow circular friction along the base of the skull, then work down each side of the neck. Squeeze the trapezius muscle (the ridge between neck and shoulder) with your opposite hand, holding for 3–5 seconds per spot.
- Calves: sit on a chair or the floor. Use both thumbs to apply effleurage (long, gliding strokes) from ankle to knee. Follow with circular friction on any tight spots.
- Feet: use your thumbs to press along the arch from heel to ball in slow, firm circles. Spend extra time on the heel pad and the ball of the foot.
- Lymphatic strokes (optional): finish with very light, upward brushing strokes from wrist to elbow and from ankle to knee. These encourage fluid movement and reduce puffiness.
At-home devices worth knowing:
Wellness gadgets like massage rollers, percussion devices, and acupressure mats can extend the benefits of manual massage and provide structural support for pain management and recovery when used regularly. A foam roller works well for the calves and upper back. Percussion massagers reach deeper tissue than fingers can. Acupressure mats stimulate multiple pressure points simultaneously and are especially useful for back tension after a long day of sitting.
When to skip deep massage:
- Acute injury, inflammation, or swelling in the area
- Blood clots or a history of deep vein thrombosis
- Skin infections, open wounds, or bruising
- Unexplained pain that has not been evaluated by a doctor
A focused neck-and-shoulder session takes 10 minutes. A full-body sequence including calves and feet runs 15–20 minutes. For guidance on how wellness gadgets support your routines, the Evergreenbliss blog covers device use-cases in detail.
6. Scalp and hair treatments: masks, oils, and thermal wraps
The simplest scalp treatment to try tonight is a warm coconut oil massage. Apply it, wrap your hair in a warm towel, and your hair will feel noticeably softer after a single rinse. The heat from the towel helps the oil penetrate the shaft rather than just coating the surface.
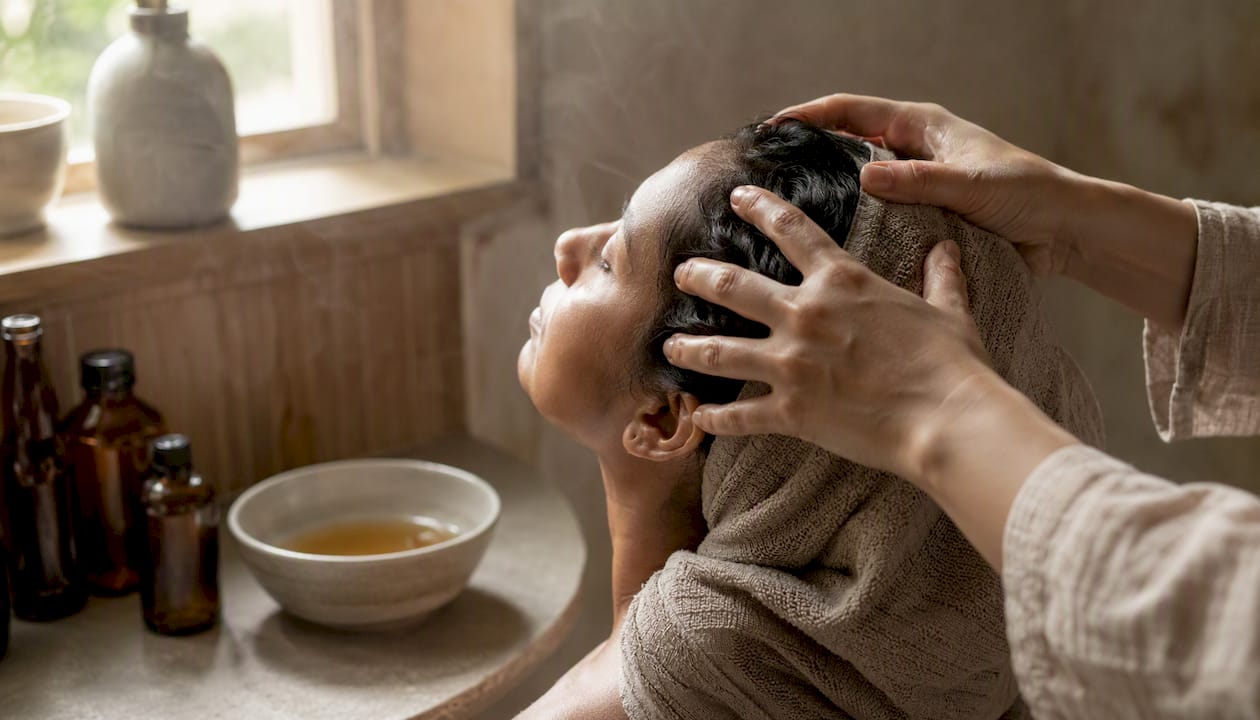
Two DIY mask recipes:
Hot oil treatment (dry, damaged, or color-treated hair):
- 2–3 tablespoons coconut oil or olive oil (warmed in a small bowl set in hot water for 2 minutes)
- Optional: 5 drops of rosemary essential oil mixed in before applying
- Section hair and apply from roots to ends, massaging the scalp for 3–5 minutes
- Cover with a shower cap, then wrap in a warm towel for 20–30 minutes
- Rinse with warm water, then shampoo once
Yogurt and honey mask (for frizz, dryness, or dull hair):
- 3 tablespoons plain full-fat yogurt
- 1 tablespoon raw honey
- Mix and apply to damp hair from mid-shaft to ends (avoid the scalp if your hair is fine or prone to greasiness)
- Leave on for 20 minutes, then rinse thoroughly with cool water
- Shampoo lightly if needed
Frequency and tips:
- Hot oil treatments: once a week for very dry hair, every two weeks for normal hair
- Yogurt-honey masks: once a week or as needed for frizz
- Always rinse with cool or lukewarm water to seal the cuticle after any conditioning treatment
- Budget-friendly DIY recipes like these use ingredients most people already have, making them easy to repeat
7. Relaxation practices to pair with any treatment
Pairing a short breathing exercise or body scan before a treatment primes the nervous system and deepens the relaxation you get from the physical ritual. The two work together in a way that neither does alone.
Step-by-step mini protocols:
- 2–5 minute breath focus (before any treatment): sit or lie comfortably. Inhale slowly through the nose for a count of 4, hold for 2, exhale through the mouth for a count of 6. Repeat 6–8 cycles. The extended exhale activates the parasympathetic nervous system. For a deeper dive into the mechanics, deep breathing and stress reduction is worth reading.
- 10–20 minute body scan (during a bath or mask): starting at the top of the head, slowly move attention down through the face, neck, shoulders, chest, arms, belly, hips, legs, and feet. At each area, notice any tension without trying to fix it. Simply observing tends to release it.
- Guided imagery (5–10 minutes, any time): close your eyes and picture a calm, familiar place in detail. Notice the colors, sounds, temperature, and textures. Spend 30 seconds on each sensory layer before moving to the next. This is more effective when you use a place you have actually been to rather than an imagined one.
According to Harvard Health, experts recommend sampling several relaxation techniques and aiming for about 20 minutes of practice a day for the greatest benefit, while noting that even a few minutes helps. The key is finding the method that you will actually repeat.
Clinical guidance from NCBI reports that relaxation techniques can reduce cortisol levels in some studies, supporting their physiological effect on stress. Clinicians recommend regular practice and variety over relying on a single method.
For a ranked breakdown of which techniques deliver the most consistent results, stress relief techniques ranked by effectiveness offers a practical comparison.
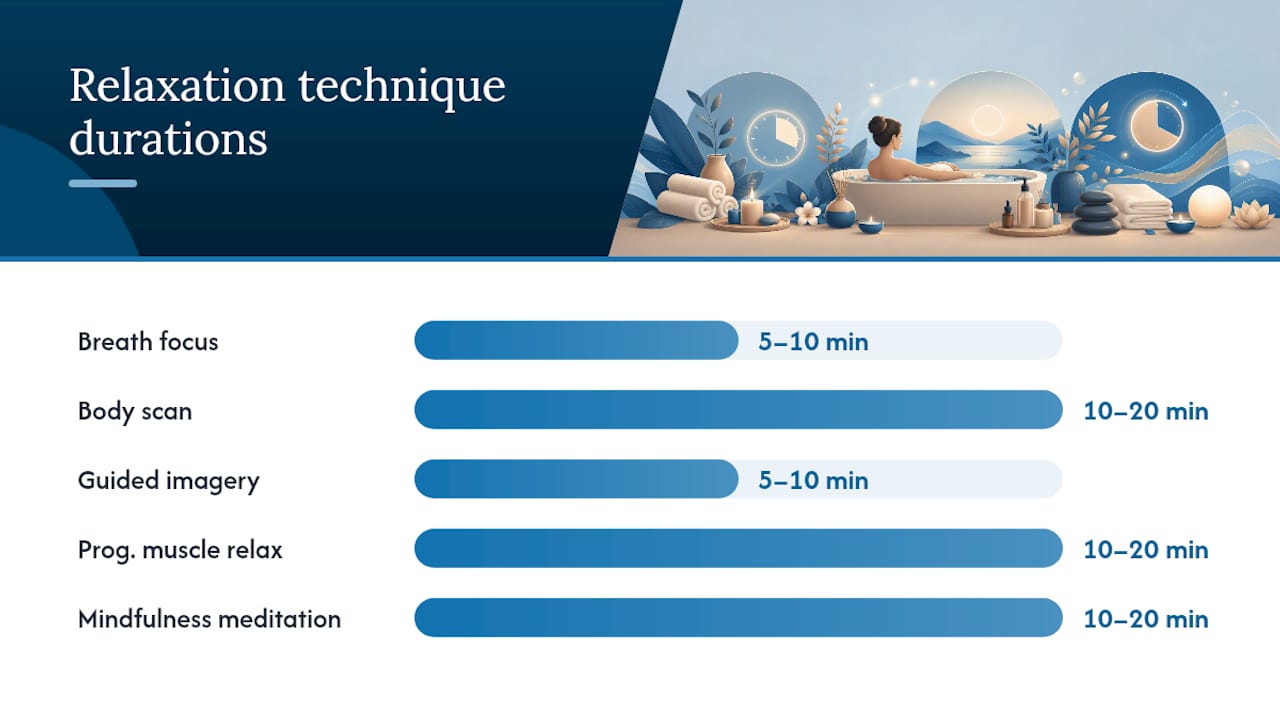
| Technique | Recommended time | Primary benefit |
|---|---|---|
| Breath focus | 5–10 min | Activates parasympathetic response |
| Body scan | 10–20 min | Releases held muscle tension |
| Guided imagery | 5–10 min | Reduces perceived stress and anxiety |
| Progressive muscle relaxation | 10–20 min | Systematic tension release |
| Mindfulness meditation | 10–20 min | Sustained calm, improved focus |
8. How to set up your at-home spa space
The three essentials for a home-spa atmosphere are temperature, sound, and scent. Get those three right and even a plain bathroom feels like somewhere you want to stay.
Supplies by session length:
10-minute quick session:
- One warm towel (microwave a damp towel for 30 seconds)
- A single candle or dim lamp
- One product (a mask, a foot soak, or a face oil)
30-minute standard session:
- Two towels, a robe or comfortable clothes
- Epsom salts or a face mask
- A playlist (lo-fi, nature sounds, or binaural beats)
- A diffuser with lavender or eucalyptus, or a few drops of oil in the shower
60-minute full ritual:
- Everything above, plus a scrub, a hair mask, and a self-massage tool
- Infused water or herbal tea
- Phone on Do Not Disturb, notifications off
Sample timelines:
30-minute express routine:
- Minutes 0–5: breath focus, dim lights, start diffuser
- Minutes 5–15: facial steam and mask
- Minutes 15–25: foot soak with Epsom salts
- Minutes 25–30: moisturize, body scan, settle
60-minute full ritual:
- Minutes 0–5: breath focus
- Minutes 5–20: body scrub in the shower
- Minutes 20–45: bath soak with Epsom salts and essential oils
- Minutes 45–55: scalp oil massage, hair wrapped in towel
- Minutes 55–60: moisturize, guided imagery, rest
Pro Tip: Sequence treatments from largest to smallest: scrub before soaking, soak before masking, mask before moisturizing. This order prevents you from washing off products you just applied and avoids over-exfoliating in a single session.
For sensory tools that enhance the atmosphere, sensory relaxation tools for stress relief covers sound, scent, and tactile options in detail. A practical DIY spa day emphasizes that atmosphere matters as much as the products themselves, and that inexpensive substitutions keep the ritual affordable enough to repeat weekly.
9. Safety, skin types, allergies, and when to skip a treatment
People with sensitive skin, active dermatitis, diabetes, recent surgery, or compromised circulation should patch test every new product and modify or skip any treatment that involves heat, pressure, or active ingredients.
Quick patch test checklist:
- Apply a small amount of the product to your inner wrist or behind the ear
- Wait 24–48 hours before using it on a larger area
- If you see redness, itching, swelling, or burning, do not proceed
- Retest after any formula change, even if you have used a similar product before
Hygiene rules:
- Wash reusable tools (gua sha, rollers, foot files) with soap and warm water after every use
- Never share exfoliation tools between people
- Discard single-use masks and scrubs after one application; do not double-dip into jars with wet hands
- Keep water temperature moderate; very hot water strips the skin barrier and worsens dryness
Modifying for sensitive skin:
- Replace sugar or salt scrubs with a soft washcloth or an oat-based exfoliant
- Dilute any acid-based mask (AHA, BHA) to half the recommended frequency
- Avoid essential oils on reactive skin; use plain carrier oils instead
- Mayo Clinic guidance on relaxation techniques also notes that some techniques, including massage and hydrotherapy, should be modified or avoided for certain health conditions
When to consult a professional:
- Persistent skin reactions that do not clear within 48 hours
- Pain that worsens during or after massage
- Unexplained rashes, lesions, or changes in skin texture
- Severe anxiety, chronic insomnia, or pain that home rituals are not addressing
10. Why regular at-home rituals actually work
Regular, short relaxation practices and gentle repeated care can reduce stress markers and support better sleep and recovery over time. The key word is repeated: a single session feels good; a weekly habit changes how your baseline feels.
Mayo Clinic confirms that relaxation techniques including deep breathing, guided imagery, progressive muscle relaxation, massage, and hydrotherapy can lower physiological stress responses. These are not fringe wellness claims; they are standard recommendations from mainstream clinical sources.
NCBI clinical summaries report that relaxation techniques can reduce cortisol levels in some studies, and clinicians recommend using a variety of techniques tailored to the individual rather than relying on one method alone.
The therapist-backed sequencing principle, warm the body first, apply the treatment, then settle into rest, reduces the risk of irritation and improves how much benefit you perceive from the session. That structure is not arbitrary; it mirrors what professional spa protocols use.
When to see a professional:
- Persistent muscle pain or joint pain that does not respond to self-massage
- Unexplained skin reactions or conditions that worsen with home treatments
- Severe anxiety, chronic insomnia, or depression that home rituals are not addressing
- Specialized skin conditions (cystic acne, psoriasis, rosacea) that need a dermatologist’s guidance
What the Evergreenbliss approach to home wellness looks like
Home wellness rituals work best when they are simple enough to repeat. That is the core belief behind what Evergreenbliss recommends: not elaborate setups that you do once, but small, consistent practices that compound over weeks and months.
DIY treatments like the ones in this article handle the surface layer well: they cleanse, hydrate, exfoliate, and calm. Where tools add genuine value is in the layer underneath, the muscle tension, sleep quality, and recovery that pantry ingredients cannot reach on their own. A percussion massager gets into the trapezius in a way that fingertips cannot. An acupressure mat delivers sustained pressure-point stimulation that a self-massage session rarely sustains for long enough. A white noise machine or sleep mask extends the calm from a bath ritual into actual sleep.
Wellness gadgets used as part of a regular at-home routine can extend treatment benefits for pain management, sleep, and recovery in ways that DIY recipes alone do not cover. The two approaches are not competing; they are complementary.
Evergreenbliss tools that complement your home spa rituals
The DIY treatments in this article cover most of what a home spa day needs. For readers who want to go further, Evergreenbliss offers personal care gadgets and recovery tools that slot naturally into the routines above.
A neck massager or percussion device handles the deep-tissue work that manual self-massage cannot sustain. An acupressure mat pairs directly with the body-scan practice in Section 7. A sleep mask and white noise machine extend the calm from a bath or meditation session into better sleep. These are not replacements for the DIY rituals; they are additions that make the results last longer.
Evergreenbliss ships free on all orders and offers easy returns, so trying a single tool carries no real risk. Browse the personal care and hygiene gadgets collection to see what fits your current routine, or check the home fitness recovery equipment category for rollers, mats, and percussion devices.
Sources
- At-home spa day & facial self-massage (Time)
- Six relaxation techniques to reduce stress (Harvard Health)
- Relaxation techniques: Try these steps to lower stress (Mayo Clinic)
- Relaxation techniques and clinical guidance (NCBI Bookshelf)
- 5 Therapist-Backed Spa Treatments You Can Do at Home (BodyTalks)