Resistance bands work as a rehabilitation tool because they load muscles and joints with adjustable, low-impact tension that scales up as you heal, which is why physical therapists build entire recovery plans around them. If you’re starting today, pick a light band, run through one clinician-approved movement (a seated row or a banded shoulder external rotation works for most people), and pay attention to how your joint feels during and after. Stop immediately and call your physical therapist if you feel sharp pain, numbness, or swelling that wasn’t there before. Nothing here replaces an individualized prescription from a licensed clinician who has actually looked at your injury.
Key Takeaways
Resistance bands deliver safe, progressive strength and mobility gains for rehab when resistance level and progression follow perceived effort and clinician guidance rather than a fixed number.
| Point | Details |
|---|---|
| Start light, progress by feel | Increase reps before resistance, and move up a band level only once form stays clean for a full set. |
| Match band type to the joint | Loop bands suit hip and shoulder stabilizer work; tubes with handles suit single-limb pulling and pressing. |
| Follow the three-phase structure | Move from protected motion to controlled strengthening to functional, loaded return, not all at once. |
| Inspect and anchor properly | Check for nicks before every session and anchor to a stationary, smooth surface, never a sharp edge. |
| Choose rehab-grade equipment | Evergreenbliss’s sleeved, latex-free band sets with included anchors and clear labeling support consistent daily use. |
Primary Sources and Further Reading
- Biomechanics of Elastic Resistance in Therapeutic Exercise Programs: the core biomechanics research explaining how percent elongation determines band resistance.
- PMC article (NCBI) on elastic resistance and rehabilitation: peer-reviewed support for elastic resistance improving strength and function across rehab populations.
- PMC article (NCBI) supporting elastic resistance in home programs: evidence that home-based band programs can produce meaningful gains without constant supervision.
- Resistance Training With Exercise Bands (Kaiser Permanente): patient education guidance on safe band use and when to involve a clinician.
- How to use resistance bands (Healthline): practical consumer-facing guidance on getting started with bands at home.
This article is general information, not a substitute for advice from a qualified doctor. Consult a qualified healthcare professional about your own circumstances before acting on anything here.
Table of Contents
- Why Physical Therapists Reach for Resistance Bands in Rehab
- Types of Resistance Bands and When Each One Fits
- How Elastic Resistance Actually Loads Your Body
- The Three Phases of a Band-Based Rehab Plan
- How to Progress Safely Without Overdoing It
- Safety Rules, Anchoring, and Who Should Avoid Bands
- What to Look for When Buying Bands for Home Rehab
- What the Research Actually Shows, and Where It Falls Short
- A Clinical View on What Actually Drives Rehab Success With Bands
- Get Set Up for Home Rehab With the Right Bands
- Sources
Why Physical Therapists Reach for Resistance Bands in Rehab
Ask any physical therapist why bands sit in nearly every treatment room and you’ll get a version of the same answer: they let you load a joint without punishing it. Free weights apply a fixed load through the entire range of motion. Bands don’t. Tension builds as the band stretches, so the load is lightest exactly where an injured joint is weakest, typically at the start of a movement, and heaviest where the muscle is strongest to control it.
That single mechanical quirk explains most of the clinical benefits:
- Joint-friendly loading. Resistance ramps gradually instead of slamming a joint with peak force at the bottom of a rep.
- Progressive resistance without new equipment. One band, used at different lengths or anchor points, can take a patient from week one to week twelve.
- Portability. A full home program fits in a gym bag, which matters for people who can’t get to a clinic three times a week.
- Neuromuscular retraining. Because bands demand constant tension control, they train the small stabilizing muscles around a joint, not just the prime movers.
- Low cost relative to outcome. A handful of bands covers what would otherwise require a cable machine or a full set of dumbbells.
Pro Tip: Early in rehab, the goal usually isn’t lifting heavier. It’s teaching the joint to control the band’s pull without wobbling. If your knee or shoulder shakes during a rep, drop the resistance before you add more.
Clinical literature backs this up. Peer-reviewed research indexed on NCBI supports elastic resistance as an effective way to improve strength and functional outcomes across rehab populations, and patient education from health systems like Kaiser Permanente points to the same combination of strength, flexibility, and range-of-motion gains that make bands a default tool in outpatient PT.
Types of Resistance Bands and When Each One Fits
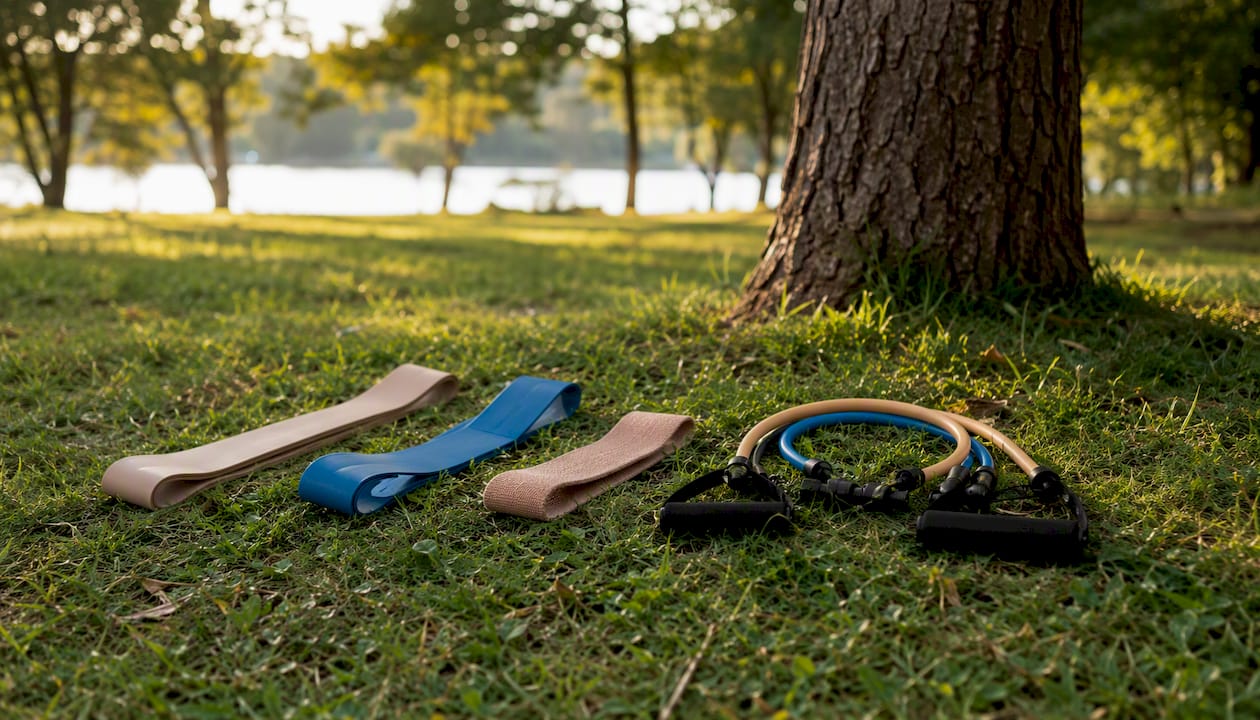
Not every band does the same job, and picking the wrong style for the wrong phase of recovery is one of the most common mistakes home users make. Flat bands (often called Therabands), loop bands, mini-loops, and tubes with handles each solve a slightly different problem.
| Band Type | Best Clinical Uses | Typical Resistance Range | Portability | Pros / Cons |
|---|---|---|---|---|
| Flat band (Theraband-style) | Shoulder rotation, ankle work, early-phase rehab | Light to heavy, color-coded | Very high | Pro: versatile and cheap. Con: can roll or fold during use |
| Loop band | Hip and glute activation, shoulder stabilizers | Light to medium | High | Pro: no grip needed. Con: less useful for single-arm pulling |
| Mini-loop band | Hip abduction, knee stability drills | Light to medium | Very high | Pro: fits in a pocket. Con: limited range for larger joints |
| Tube with handles | Rows, presses, single-limb strengthening | Light to heavy | Medium | Pro: mimics cable-machine movements. Con: handles can wear out first |
Color-coding gives you a rough sense of resistance level, from light (often yellow or tan) up through heavy (blue, black, or beyond, depending on the brand), but that system is a guideline, not a standard. Unlike a dumbbell that reads “10 lbs” no matter who picks it up, a band’s actual force output depends on how far you stretch it, which means two “medium” bands from two different manufacturers can feel completely different. That’s part of why manufacturer instruction manuals.pdf) map color to approximate force at set elongation percentages, but a clinician still has to translate that into what actually works for your joint on a given day.
A few practical buying notes matter more than most people expect:
- If you have a latex allergy, buy latex-free bands specifically. Standard exercise bands are usually natural rubber latex, and a reaction mid-rehab is the last thing you need.
- Loop bands tend to work better for hip and shoulder stabilizer training, where you don’t need a hand grip and want tension to sit directly on the joint you’re targeting.
- Tubes with handles are the better call for single-limb pulling and pressing work, where grip control actually matters to the exercise.
Pro Tip: Buy a set that spans at least three resistance levels. Rehab progress often outpaces a single band’s usable range within two or three weeks, and you don’t want to be stuck waiting on a new order.
How Elastic Resistance Actually Loads Your Body
A band’s resistance isn’t fixed. It’s a function of how far you stretch it, called percent elongation, and that single variable is the whole reason bands behave differently from every other piece of home fitness equipment.
This is what biomechanics research published in the Journal of Orthopaedic & Sports Physical Therapy describes as the force-elongation relationship, and it’s the reason therapists don’t just hand you a color and call it a prescription. Selection and progression with bands is guided as much by how the movement feels (perceived effort) as by any printed resistance label.
A band stretched to twice its resting length can produce roughly double the resistance of the same band at its starting length, but that relationship varies by material and thickness, which is why clinicians lean on perceived effort rather than a fixed number when adjusting your program.
That gives you, and your therapist, several ways to change the load without buying a new band:
- Shorten the anchor distance. Stand closer to where the band is anchored and you reduce the stretch, and the resistance, at the start of the movement.
- Change the lever arm. Holding the band farther from your body, or extending your arm fully before pulling, increases the torque your muscles have to control.
- Alter the tempo. Slowing the eccentric phase, the part where the band is returning to length, increases time under tension without touching resistance at all.
This is one reason home users plateau faster than they should. They assume “harder” means a new band, when often it just means standing two steps farther from the anchor point.
The Three Phases of a Band-Based Rehab Plan
A well-built rehab program with bands moves through three broad phases, and the biggest mistake home users make is rushing from phase one to phase three because the exercises feel easy on a good day.
-
Acute or protected phase. The goal here is pain-free range of motion and light activation, not strength. Progression cue: move on only when you can complete every rep pain-free for two consecutive sessions.
- Isometric band holds at a comfortable joint angle (no movement, just steady tension).
- Very light banded range-of-motion drills, like a seated ankle dorsiflexion pull.
- Gentle scapular retraction with a flat band for shoulder injuries.
- Feel for: mild muscle fatigue. Avoid: any sharp or pinching pain.
-
Controlled strengthening phase. Once motion is pain-free, you start building actual strength and control. Progression cue: increase reps before you increase resistance; only move up a band level once you can do 3 sets of 15 with clean form.
- Standing banded rows for scapular and upper-back strength.
- Loop-band lateral walks for hip and glute activation.
- Banded squats to reinforce knee tracking and control.
- Single-leg banded balance work with light perturbation.
- Feel for: working fatigue by the last few reps. Avoid: compensating with your back or opposite limb.
-
Functional and loaded return phase. This is where bands start mimicking real-world and sport-specific demands. Progression cue: add speed, direction changes, or sport-specific patterns only after strength benchmarks from phase two are met consistently.
- Tube-with-handle presses that replicate pushing or throwing motions.
- Resisted lateral shuffles for return-to-sport agility.
- Banded single-arm rotational pulls for core and shoulder integration.
- Feel for: confident, controlled power. Avoid: any hesitation or guarding around the injured area.
If you have access to demonstration video from your clinic or a trusted source, this is exactly where it earns its place, watching correct scapular positioning on a banded row prevents weeks of reinforcing a bad pattern.
Contact your physical therapist immediately, regardless of phase, if you notice new sharp pain, swelling that develops within hours of a session, numbness or tingling, or any symptom that doesn’t settle within 24 hours of rest. Waiting more than two or three days on a red-flag symptom, hoping it resolves on its own, is the single most common reason home rehab plans stall out.
How to Progress Safely Without Overdoing It
Progression in band-based rehab isn’t about adding resistance every week just because you can. It’s about earning the next level through clean, repeatable performance.
A basic progression checklist looks like this:
- Increase reps within your current band before increasing tension.
- Add a second or third set once single-set reps feel consistently manageable.
- Move up one resistance level only when you can complete your full rep target with good form and no compensation.
- Use your rate of perceived exertion (RPE), on a 1 to 10 scale, as a guide: rehab strength work typically sits around 5 to 7, not maxed out at 9 or 10.
- For endurance-focused rehab goals, higher reps (15 to 20) at lower RPE tend to outperform low-rep, high-tension work.
Healthline’s practical guidance on resistance band use makes a similar point: bands can rival free weights for strength gains in the right context, but starting under professional guidance matters, especially if you’re not sure how a given movement should feel.
Questions worth asking your physical therapist at your next visit:
- Which specific band resistance and exercises match my current phase?
- How many reps and sets should I actually be doing at home, not just in the clinic?
- What does “too much” feel like for my specific injury, versus normal working fatigue?
- When should I expect to move to the next phase, roughly?
And a short but firm red-flags list: stop and call your PT if you notice sharp or stabbing pain (different from muscle fatigue), new swelling, any numbness or tingling that wasn’t present before, or a sensation of instability or giving way in the joint.
Safety Rules, Anchoring, and Who Should Avoid Bands
Resistance bands are safe for most people recovering from injury, as long as you inspect them regularly and use proper anchoring, but there are real contraindications worth knowing before you start. Certain conditions, including unstable fractures, recent surgical repairs without clearance, or specific neurological conditions affecting muscle control, require direct physical therapist involvement before any band work begins.
Before every session, run through this quick anchor-and-inspect routine:
- Check the entire band for nicks, thinning spots, or small tears, especially near the ends where stress concentrates.
- Never anchor a band around a sharp edge, doorknob, or exposed hinge; use a proper door anchor or a smooth, stationary object.
- Double-check that door anchors are wedged securely on the opposite side of the door before you pull.
- Replace any band showing visible wear immediately. A band that snaps mid-rep, especially near your face, is a genuine injury risk.
A few form errors show up constantly in home programs, even among people who’ve done the exercise correctly in the clinic:
- Overstretching a band well past its rated range to compensate for a resistance level that’s too light.
- Letting the shoulder blade shrug up instead of maintaining scapular control during rows or presses.
- Using momentum or trunk rotation to complete a rep instead of the target muscle group.
Kaiser Permanente’s patient education resources reinforce the same anchoring and safety-check habits, and for good reason: most band-related injuries come from equipment failure or bad anchoring, not the exercises themselves.
What to Look for When Buying Bands for Home Rehab
Not all bands sold online are built for rehab use, and the difference shows up fast once you’re doing daily sessions instead of an occasional workout. A checklist worth running through before you buy:
- Durability through sleeving. A fabric or protective sleeve around the elastic core reduces snap risk and extends usable life.
- Secure, non-slip handles on tube-style bands, so grip fatigue doesn’t cut a session short.
- Clear resistance labeling you can actually read after months of use, not a sticker that peels off in week two.
- A latex-free option, since allergic reactions during rehab are avoidable with the right material choice.
- Included anchors so you’re not left improvising with a door hinge.
- A reasonable warranty or return policy, since even well-made bands wear out and you’ll want to replace them without friction.
The Evergreenbliss resistance bands set checks each of those boxes: sleeved construction for snap resistance, clearly labeled resistance levels so you’re not guessing which band you grabbed, and a latex-free option built in for people managing allergies. For anyone who wants a broader spread across all three rehab phases in one purchase, the 11-piece Evergreenbliss set covers a wider resistance range with included door anchors, which matters given how quickly rehab progress can outpace a single band.
Skip the ultra-cheap, unlabeled bands sold in bulk with no sleeve protection. They tear without warning, and a snapped band mid-rep near your face or eyes isn’t a risk worth the few dollars saved. Once you own a set, store bands away from direct sunlight and extreme heat, both of which degrade elastic material over time, and keep them loosely coiled rather than tightly knotted to avoid permanent creases that weaken the material.
What the Research Actually Shows, and Where It Falls Short
Elastic resistance has real evidence behind it for strength and functional gains, but that evidence comes with a specific limitation: there’s no standardized quantitative load labeling the way there is for a dumbbell, which changes how you should interpret every study on the topic.
| Source | Key Takeaway | Practical Implication |
|---|---|---|
| JOSPT biomechanics research | Resistance depends on percent elongation, not a fixed number | Progression should follow perceived effort, not just a color chart |
| NCBI-indexed clinical review | Elastic resistance supports strength and functional improvement across varied populations | Bands are a legitimate primary tool, not just a supplement to weights |
| NCBI home-program study | Home-based elastic tubing programs improved outcomes in older adults | Supervised clinic time isn’t strictly required for meaningful gains |
Because a band’s resistance shifts with how far you stretch it, two people using the same “medium” band can be training at very different intensities, which is exactly why perceived effort matters more than the label on the box.
The practical translation for a home user: your therapist isn’t being vague when they say “pick a band that feels moderately hard by rep twelve” instead of naming an exact resistance number. That’s the evidence-based way to prescribe elastic resistance, given that the tool itself doesn’t come with a fixed measurement the way a barbell plate does.
A Clinical View on What Actually Drives Rehab Success With Bands
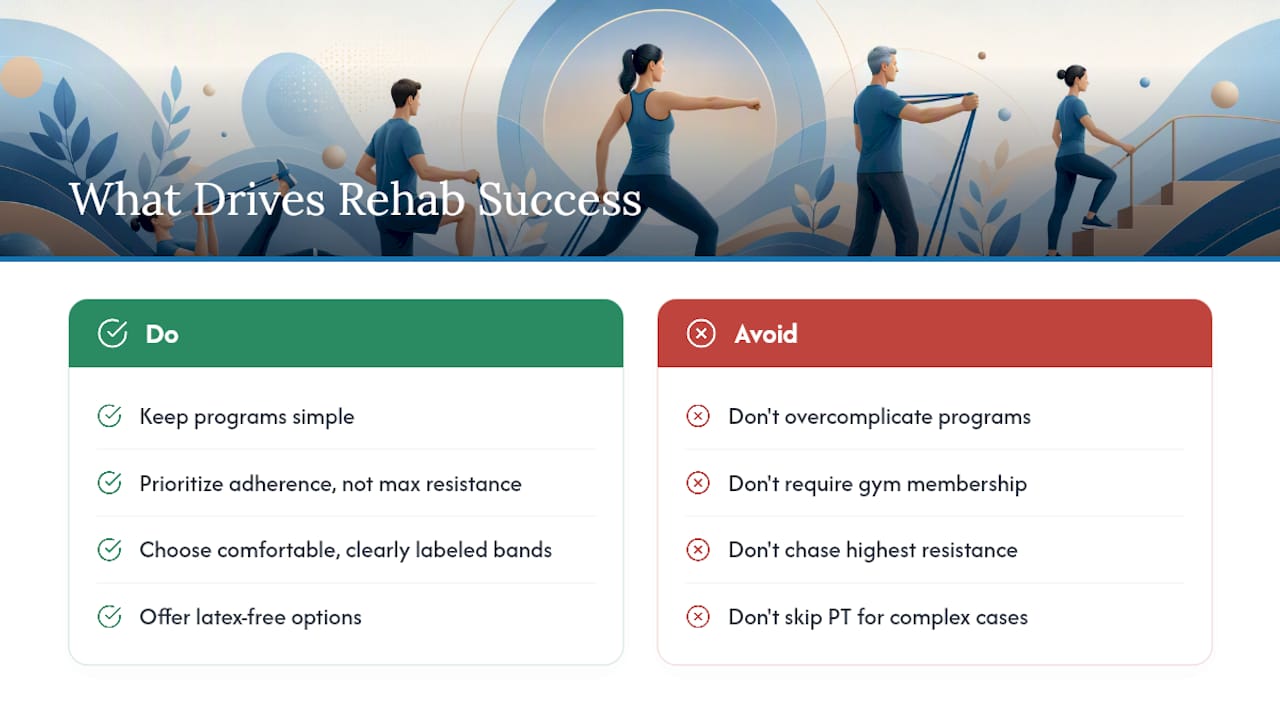
Patients don’t stick with programs they find complicated. That’s the pattern that shows up again and again in outpatient rehab: two patients with nearly identical injuries and near-identical exercise prescriptions end up with very different outcomes, and adherence, not exercise selection, is usually the deciding factor.
Bands succeed as a rehab tool precisely because they remove friction. There’s no gym membership, no waiting for equipment, no intimidating setup. A patient who does a simplified home program consistently for six weeks generally outperforms one who does a “perfect” program inconsistently. That’s why the design details matter more than people assume, a band that’s comfortable to hold, clearly labeled, and doesn’t need to be replaced every few weeks removes one more excuse to skip a session.
Evergreenbliss built its band sets around that reality rather than around chasing the highest possible resistance number. Sleeved construction reduces the fear of a mid-rep snap that makes some patients hesitant to fully commit to a movement. Clear labeling means you’re not guessing which band you’re holding three weeks into a program when the labels on cheaper sets have already faded. A latex-free option removes a real barrier for a meaningful share of patients who’d otherwise avoid band work entirely.
None of that replaces individualized clinical judgment. Complex injuries, post-surgical cases, and anything involving neurological symptoms need a physical therapist actively guiding the plan, not a blog post or a product page. But for the huge middle ground of common strains, post-acute strengthening, and functional return work, the tool matters less than whether you actually use it every day. Reach out through customer support if you have questions about matching a specific band set to your rehab goals.
Get Set Up for Home Rehab With the Right Bands
Evergreenbliss makes it simple to build a rehab-ready band setup without guessing which resistance level or style fits your recovery phase. The Home Fitness Recovery Equipment collection groups bands alongside other recovery tools, so you can put together a setup that matches your phase without piecing it together from multiple retailers.

The 11-piece resistance band set covers light through heavy resistance in one purchase, which matters since most rehab plans move through at least three resistance levels before functional return. Every band ships with sleeved construction to cut down on snap risk, a latex-free option for anyone managing allergies, and included anchors so you’re not tying a band to a door hinge on day one. If you’re not sure which resistance range fits your current phase, reach out to customer support before you order, and always follow your physical therapist’s specific guidance if you’re actively working with one. Browse the full resistance band set to get started on your next session.
Sources
- Biomechanics of Elastic Resistance in Therapeutic Exercise Programs
- PMC article (NCBI) on elastic resistance and rehabilitation
- PMC article (NCBI) supporting elastic resistance in home programs
- Resistance Training With Exercise Bands (Kaiser Permanente)
- How to use resistance bands (Healthline)